Archiving 8000 VTuber Songs and Music Covers (and counting) - Part 4: Workflow and Web UI
Finally let's put it all together and see how it works!
Updated Feb 6 2024 - Added URL to new Patchwork Archive url
The content is stored and hosted, the workers are running. The last pieces of the puzzle involve setting up a workflow to make adding new content as easy as possible, and a web UI to make it easy to browse content.
Workflow
So far I’ve only mentioned that workers download content along with any metadata and thumbnails using yt-dlp and then uploads it using rclone to the cloud storage. However, there’s actually a bit more to it than that.
Database
The first thing that happens following a successful upload is logging it into a database. I have a MySQL database set up for this purpose.
| Table Name | Description |
|---|---|
| archive_log | Stores information about which user requested archival of what content |
| archive_queue | The queue of videos waiting to be archived |
| archive_queue_auth | The list of authentication keys that allow for requesting new archival of content |
| songs | Stores information about the songs that have been archived |
| worker_status | Stores information about the status of each worker |
Songs Table
The songs table is where the bulk of the information is stored. Every time a video is successfully archived, a new row is generated along with some metadata about the video:

Nearly all this information is already accessible through the archived info.json file (and that’s also what the web interface pulls from), however, I figured that I may as well keep it here as a backup. This is the bare minimum information required in order for the web UI to properly render the video page.
Archive Queue Workflow
The web server running the web UI is also responsible for managing the archive queue API. The API itself is fairly simple:
| Endpoint | Type | Description |
|---|---|---|
| /api/worker/queue | POST | Adds the URL of a video to the archive queue. Requires Queuer Authentication |
| /api/worker/next | GET | Gets the next video in the queue. Requires Worker Identification |
| /api/worker/heartbeat | POST | Updates the status of a worker. Requires Worker Identification |
To prevent abuse, the API requires authentication for adding new videos to the queue. This is done through adding a new row to the archive_queue_auth table, with the authentication key you want to add.
If you want to be extra secure, you can always also set up a reverse proxy to only allow requests from a specific IP address or even go as far to implement encryption + salted hashing of the authentication key.
@app.route("/api/worker/queue", methods=["POST"])
def archive_url():
    """
    Endpoint for queueing a video to workers
    """
    password = request.headers.get('X-AUTHENTICATION')
    if password is None:
        abort(401)
    server = create_database_connection()
    try:
        if not server.check_row_exists("archive_queue_auth", "token", password):
            abort(401)
    except:
        abort(401)
    url = request.form.get('url')

    if server.check_row_exists("archive_queue", "url", url):
        server.close_connection()
        return "Already queued"
    server.insert_row("archive_queue", "url", (url,))
    server.insert_row("archive_log", "url, user, status, timestamp", (url, password, "Queued", datetime.datetime.now()))
    server.close_connection()
    return "OK", 200
curl -X POST -H "Content-Type: application/json" -d '{"url":"VIDEO_URL"}' -H "X-AUTHENTICATION: AUTHKEY" /api/worker/queueReading from the Archive Queue
The workers by default poll the /api/worker/next endpoint every 2 minutes to check if there are any videos in the queue. If there are, it will archive the video and immediately poll again. If there are no videos in the queue, it will enter a 2-minute sleep before polling again.
To prevent random people from polling the web server and depleting the queue, The server checks that the “identification key” of the worker is known and valid. These are separate from the keys used to queue videos.
@app.route("/api/worker/next", methods=["GET"])
def get_next_in_queue():
    """
    Endpoint for workers to get the next video in the queue
    """
    password = request.headers.get('X-AUTHENTICATION')
    server = create_database_connection()
    try:
        if not server.check_row_exists("archive_worker_auth", "token", password):
            abort(401)
    except:
        abort(401)
    next_video = get_next_video_in_queue()
    if next_video is None:
        server.close_connection()
        return "No videos in queue", 204
    server.update_row("archive_log", "url", next_video, "status", "Processed",)
    server.close_connection()
    return next_video
curl -X GET -H "X-AUTHENTICATION: AUTHKEY" /api/worker/nextWorker Heartbeat
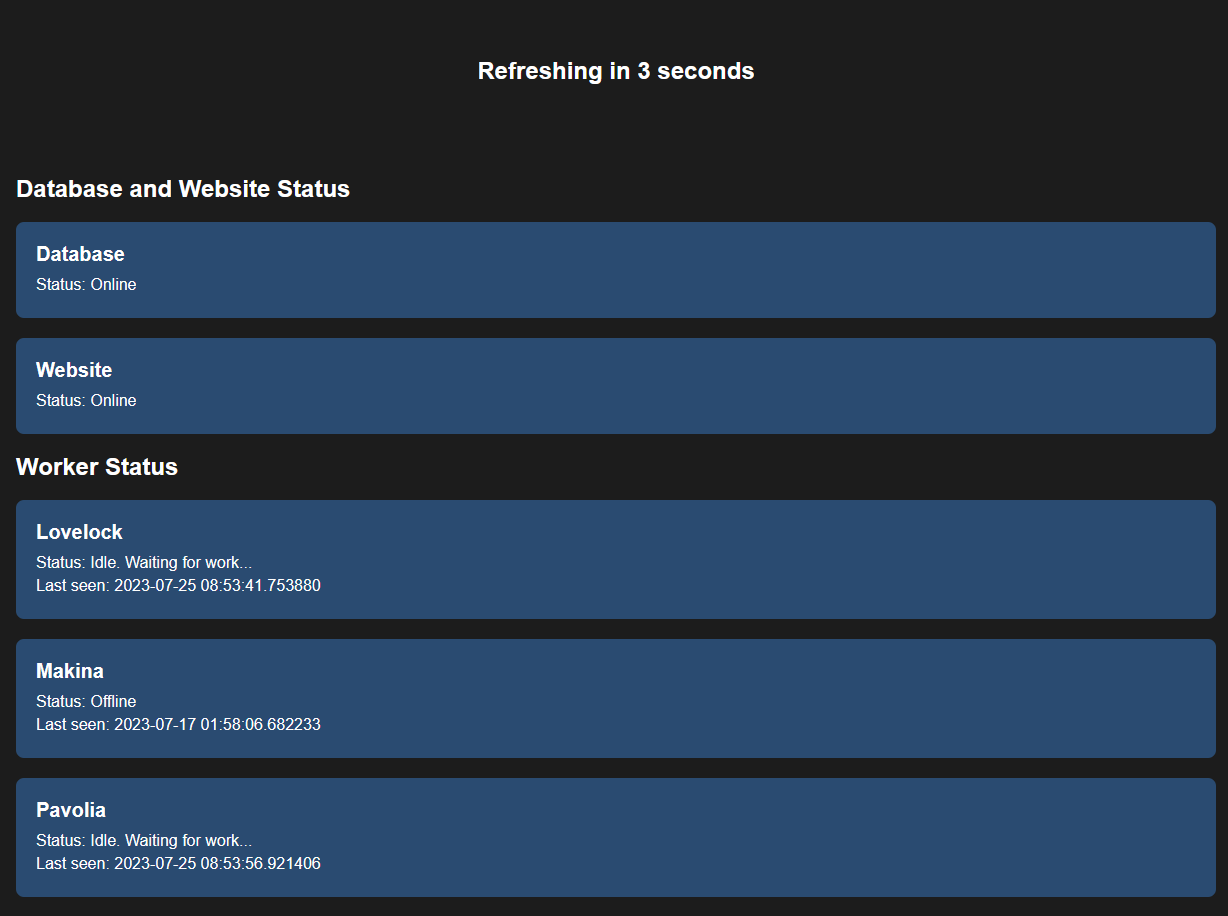
The workers poll the /api/worker/heartbeat endpoint each time they begin processing or enter/exit the 2-minute sleep. Information sent to this endpoint is written to the worker_status table which is used to determine which workers are currently active on the web UI.
I have the entirety of all the archiving and polling code in a generic try/except block, so if the worker crashes for whatever reason, it will automatically send a dying heartbeat to the server to mark it as an inactive worker.
try:
    while True:
        headers = {'X-AUTHENTICATION': password}
        next_video = requests.get(f"{base_url}/api/worker/next", headers=headers)
        if next_video.status_code == 200:
            print("Found video to archive. Starting...")
            send_heartbeat("Archiving " + next_video.text)
            worker.execute_server_worker(next_video.text)
        elif next_video.status_code == 401:
            print("Invalid credentials. The password may be incorrect")
            send_heartbeat("Invalid credentials. The password may be incorrect")
            wait_and_check_for_quit(ERROR_WAIT_TIME)
        else:
            print("No videos to archive at this time. Cooling down...")
            send_heartbeat("Idle. Waiting for work...")
            wait_and_check_for_quit(COOLDOWN_WAIT_TIME)
except Exception as e:
    if str(e) == "KeyboardInterrupt":
        print("Keyboard interrupt detected. Sending offline heartbeat...")
        send_heartbeat("Offline")
    else:
        print("An error occurred. Sending offline heartbeat...")
        send_heartbeat("Offline - An error occurred " + str(e))
Making it Easier to Request Archival
One of the challenges of archiving only a subset of videos is that it can be difficult to identify and actively find videos to archive. Of course, you could always just send a POST request each time you want to archive a video, but that’s not very user-friendly.
To make it easier, I’ve set up a couple of tools which enable the potential of crowdsourcing archival requests:
Tampermonkey Script
A simple Tampermonkey script can be used in conjunction with the /api/video endpoint to check if a video has already been archived. If not then show a button to request archival.
function checkVideoId() {
    overlay.textContent = ''; // Reset overlay content before each check
    const videoId = extractVideoId(window.location.href);
    if (videoId) {
        const videoUrl = `${apiUrl}${videoId}`;
        // Fetch the video information
        axios.get(videoUrl)
            .then(response => {
                if (response.data.error) {
                    overlay.textContent = 'Video NOT Archived yet';
                    addButton(videoId);
                } else {
                    overlay.textContent = 'Video is Archived (DONE)';
                }
            })
            .catch(error => {
                console.error('Error fetching video information:', error);
                overlay.textContent = 'Failed to check video existence';
            });
    }
}
You can also handle saving the authentication key in the browser’s local storage to make it easier to request archival of videos.
function sendPostRequest(videoId) {
    const videoUrl = `https://youtube.com/watch?v=${videoId}`;
    const postData = new URLSearchParams();
    postData.append('url', videoUrl);

    const headers = {
        'X-AUTHENTICATION': getAuthenticationToken(),
        'Content-Type': 'application/x-www-form-urlencoded'
    };

    axios.post(queueUrl, postData.toString(), { headers })
        .then(response => {
        if (response.status === 200) {
            overlay.textContent = 'Video Archiving request sent';
        } else {
            overlay.textContent = 'Failed to send Archiving request';
            addButtonForTokenChange();
        }
    })
        .catch(error => {
        console.error('Error sending Archiving request:', error);
        overlay.textContent = 'Failed to send Archiving request';
        addButtonForTokenChange();
    });
}

function openAuthenticationPopup() {
    const token = "Your Token Here!";
    const newToken = prompt('Please enter your authentication token:', token);
    if (newToken !== null) {
        setAuthenticationToken(newToken);
    }
}

function setAuthenticationToken(token) {
    localStorage.setItem(tokenKey, token);
    window.location.reload();
}
Full script can be found here (fair warning, it’s uhh very “copy paste from stackoverflow”)
Discord Bot
A Discord bot can also be helpful in this case. You can write a pretty simple bot with discord.py that has a singular slash-command and allows for a singular URL to be passed in. The bot can then check if the user requesting has a particular role and forego the need for everyone to keep an authentication key on hand (of course one will still need to be issues to the bot).
import discord
import requests

bot = discord.Bot()

endpoint = "127.0.0.1/api/worker/queue"
auth_token = "" # For queueing


def queue_video(url):
    headers = {
        "X-AUTHENTICATION": auth_token
    }
    data = {
        "url": url
    }
    response = requests.post(endpoint, headers=headers, data=data)
    if response.status_code != 200:
        return False, response.status_code
    else:
        return True, response.status_code


@bot.command(name="archive", description="Add a video to the archive queue")
async def archive_queue(ctx, url: str = None):
    if url == None:
        await ctx.respond("Please provide a url to archive!")
        return
    role = discord.utils.get(ctx.guild.roles, name="Archive Queuer")
    if role not in ctx.author.roles:
        await ctx.respond("You do not have permission to use this command!")
        return
    response = queue_video(url)
    if response[0] == False:
        await ctx.respond(f"Failed to queue. Error code: {response[1]}")
    await ctx.respond(f"Added to the queue!")

bot.run("BOT_TOKEN")
Automatic Holodex Fetch
Using the code from the first post, you can also set up a script to search the Music_Cover and Original_Song topics on Holodex. Then check the first 200 URLs and ensure that they are all archived. If not, then queue them for archival.
try {
    Holodex holodex = new Holodex(HOLODEX_API_KEY);
    for (int i = 0; i < MAXIMUM; i += 50) {
        System.out.println("Getting videos from " + offset + " to " + (offset + 50));

        List<SimpleVideo> videos = (List<SimpleVideo>) holodex.searchVideo(
            new VideoSearchQueryBuilder().setSort("newest").setTopic(List.of("Music_Cover", "Original_Song"))
            .setPaginated(false).setLimit(50).setOffset(offset));

        for (Object video : videos) {
            SimpleVideo vid = (SimpleVideo) video;
            Video detailedVid = holodex.getVideo(new VideoByVideoIdQueryBuilder().setVideoId(vid.id));

            System.out.println("Checking " + vid.id + "    " + vid.title);

            if (vid.status.equals("past") && !videoIsArchived(vid.id) &&
                detailedVid.duration > 60 && detailedVid.duration < 600){ // Just in case the video is tagged wrong
                if (queueVideo("https://www.youtube.com/watch?v=" + vid.id)) {
                    System.out.println("Queued " + vid.id);
                } else {
                    System.out.println("Failed to queue " + vid.id);
                }
            }
        }
        offset += 50;
        System.out.println("Sleeping for 2 minutes");
        Thread.sleep(120000); // You should swap this out for a proper cron job
}

} catch (HolodexException ex) {
    throw new RuntimeException(ex);
} catch (InterruptedException e) {
    throw new RuntimeException(e);
}
Full script here. Requires JHolodex
Web UI
The web UI itself is super simple. Everything is good old HTML, CSS, and JS. I figured since there wasn’t really any “responsive” design, it would be easier to just write it all in vanilla JS.
I’ve opted to use Flask as the web server for this project since it’s fairly lightweight and when combined with templates and Jinja2, it’s fairly easy to serve up static pages.
Landing Page
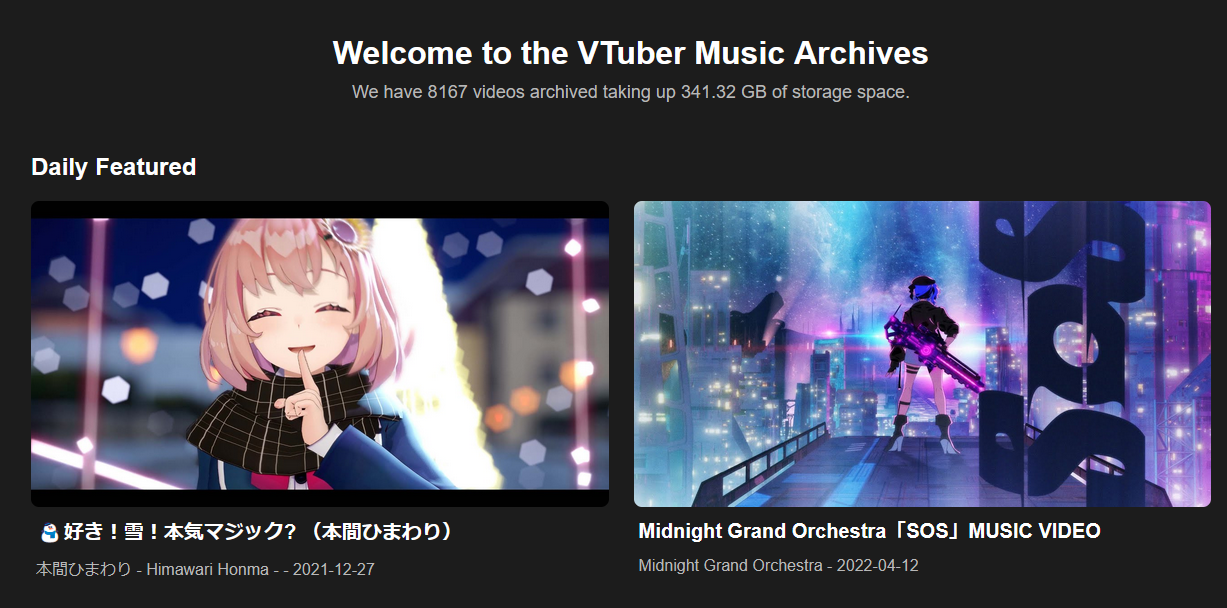
The landing page features some basic information I pulled from the Cloudflare R2 API and shows 2 randomly selected featured videos at the top of the page. This is basically done by using a random number generator where today’s date is the seed. A fairly simple way to ensure that the same videos are shown for the entire day.
def pick_featured_videos(max_videos: int):
    today = datetime.date.today()
    date_integer = int(today.strftime("%Y%m%d"))
    random.seed(date_integer)
    n1 = random.randint(1, max_videos)
    n2 = random.randint(1, max_videos)
    return n1, n2 # These are row numbers in the songs table
The Discover section below is randomly generated from the songs table each time the page is loaded, and the Recently Archived section is simply the same code again but always the 6 most recent rows from the songs table.

Each individual tile is plain HTML with data being slotted in using template literals and Jinja2.
(render_template in Flask)
<!--In this case I'd pass in a list of dictionaries containing video data-->
<div class="discover">
<h2>Discover</h2>
<div class="video-grid">
    {% for video in discover_videos %}
    <div class="video">
        <a href="/watch?v={{ video['video_id'] }}">
        <img src="{{ thumbnails_domain }}/{{video['video_id']}}.jpg" alt="{{video['title']}} Thumbnail">
        </a>
        <div class="details">
        <h3>{{ video['title'] }}</h3>
        <p>{{ video['channel_name'] }} - {{video['upload_date']}}</p>
        </div>
    </div>
    {% endfor %}
    </div>
</div>
Video Page
The video page is much of the same thing. It’s a simple page with a video tag and the same Discover section as the landing page.
The only thing worth noting here is that metadata on the page is first rendered using whatever is stored in the songs table in the database and then updated using the info.json file. This is done to ensure that the page is still usable even if the info.json file is not yet available. (Again, this is done with the render_template method)
function getInfoJSON(cdn_url) {
  var request = new XMLHttpRequest();
  request.open('GET', cdn_url + '.info.json', true);
  request.onload = function () {
    if (request.status >= 200 && request.status < 400) {
      var data = JSON.parse(request.responseText);

      var title = document.getElementById("title");
      title.innerHTML = data.title;

      var description = document.getElementById("description");
      description.innerHTML = data.description;

      var channel_name = document.getElementById("channel_name");
      channel_name.innerHTML = data.uploader;

    } else {
      console.log("Error: " + request.status);
    }
  };
  request.onerror = function () {
    console.log("Error: " + request.status);
  };
  request.send();
}
Worker Status Page
The last noteworthy page is the worker status page. This page simply renders data from the worker_status table. A reload is forced every 15 seconds to ensure that the page is always up-to-date.
Anyone who runs a worker with a valid authentication key will show up on this page, so it could be a fun thing to have other people run workers on your server and customize them with their own names/archiving messages.

Conclusion
And that’s it! That’s all I’ve got to say for now regarding this archive. You can visit the site with the big button down below if you’re interested. I don’t really feel like writing a conclusion so :p uhh I hope you drink lots of water and get lots of sleep. Bye bye!

 Patchwork Archive